Windows 下将 Openclaw(ClawdBot) 部署为系统服务
在 Windows 上运行 CLI 工具通常需要一直开着终端窗口,既不美观也不稳定。
本文介绍如何在 Windows Server 或 Windows 10/11 上,使用 Winget 快速配置环境,并利用 NSSM (Non-Sucking Service Manager) 将 openclaw 封装为系统服务。
准备工作
- 写在前面:clawdbot 命令在旧项目中可用、后来项目变更为moltbot,然后又变更为 openclaw 。安装与命令部分可完全参考官方文档 https://docs.openclaw.ai/start/getting-started
- 网络环境:需确保能访问 Telegram 服务器。
- API 准备:获取阿里云百炼或其他兼容 OpenAI/Anthropic 协议的 API Key。
1. 环境安装 (Winget)
我们使用 Windows 自带的包管理器 winget 来快速安装所需软件:NSSM (用于管理服务) 和 Node.js。
打开 PowerShell (管理员) 执行:
1 | # 安装服务管理工具 NSSM |
安装完成后,验证环境:
1 | # 验证 Node.js 版本 |
2. 安装 openclaw
环境就绪后,通过 npm 全局安装 openclaw:
1 | npm install -g openclaw@latest |
3. 配置文件
首先需要从 Telegram 的 @BotFather 新建bot获取 botToken。
尽可能使用
openclaw onboard命令初始化配置
系统自动会创建配置文件。
Windows 下通常位于用户目录 C:\Users\用户名\.openclaw\openclaw.json。
以下是一份使用阿里云百炼 (通义千问) 兼容 Anthropic 协议的配置示例:
1 | { |
提示:如果有代理需求,请在
channels.telegram中正确配置proxy字段。
4. 首次运行与配对
先在命令行手动运行,完成配对流程:
1 | openclaw gateway --verbose |
在 Telegram 向你的 Bot 发送消息,终端会显示配对码:
1 | Pairing code: XXXXXX |
新建一个终端窗口,执行配对命令:
1 | openclaw pairing approve telegram XXXXXX |
配对成功后,接下来我们将其配置为服务。
5. 配置 Windows 服务 (核心步骤)
openclaw 自带了一个 daemon install 命令,它会生成一个启动脚本,我们可以利用它:
1 | openclaw daemon install --force |
输出示例:
Installed Scheduled Task: openclaw Gateway
Task script: C:\Users\Admin.openclaw\gateway.cmd
虽然它自动创建了计划任务,但为了更稳定的管理,我们使用 NSSM 将其包装为标准服务。
5.1 创建服务
使用刚才生成的 gateway.cmd 作为服务入口:
1 | $ClawHome = "$env:USERPROFILE\.openclaw" |
5.2 配置路径与日志
为了方便排错,我们需要重定向标准输出和错误输出:
1 |
|
5.3 启动服务与排错
尝试启动服务:
1 | nssm start openclaw |
🚨 常见问题:
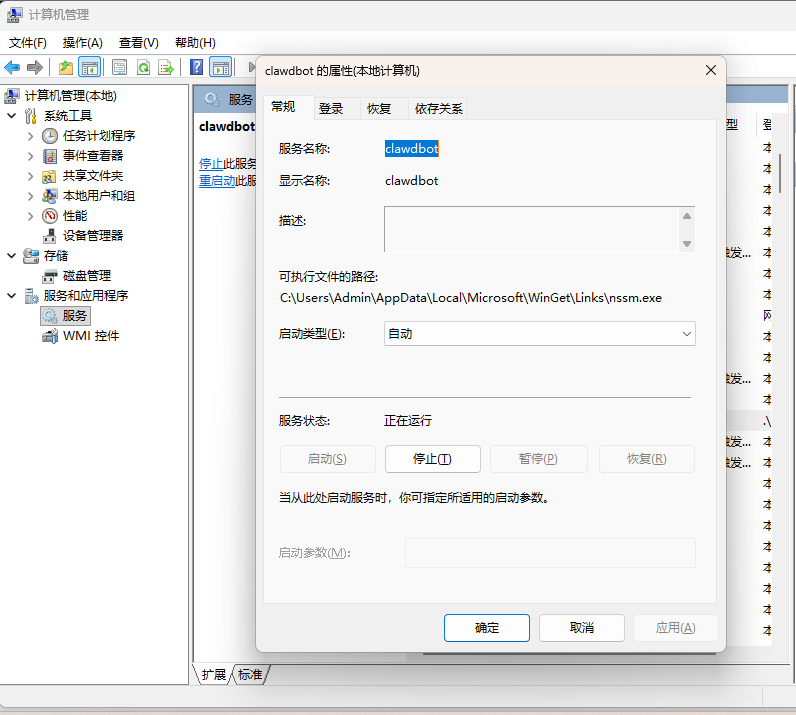
配置加载失败
如果启动后日志报错 Missing config. Run openclaw setup...,这是因为默认服务运行在 LocalSystem 账户下,找不到你当前用户目录下的 .openclaw 配置文件。
解决方法:
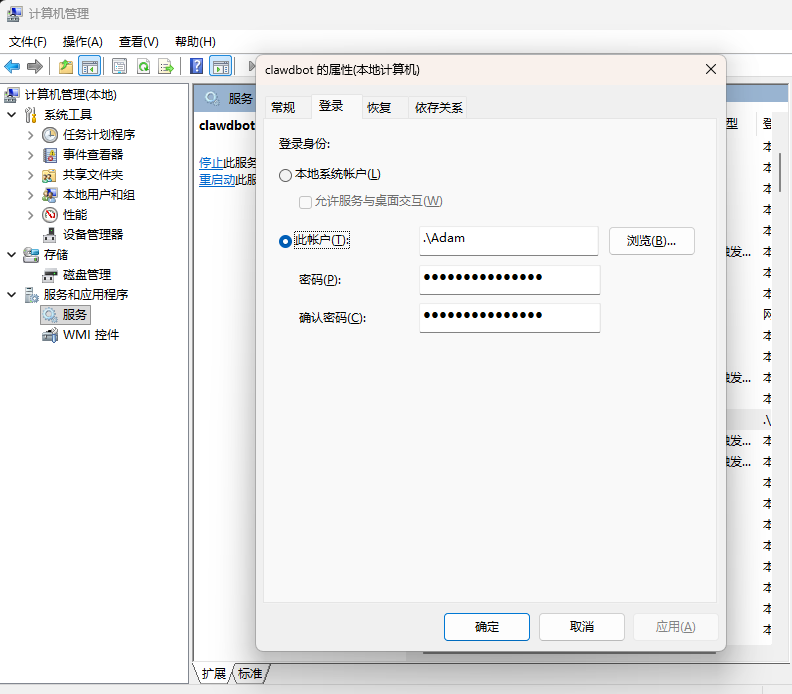
修改服务的登录账户为你当前的用户。
服务卡在 STOP_PENDING 状态,无法响应新的控制命令。
这通常发生在:
- 服务停止过程中出错/卡住
- 子进程(node.exe/cmd.exe)没有正常退出
- NSSM 服务管理器等待超时
解决步骤:
- sc query openclaw - 查看服务状态
- 找到服务对应的进程 PID
- taskkill /F /PID
- 强制结束卡住的进程 - nssm start openclaw - 重新启动服务
以后遇到类似问题可以快速处理:
查找服务PID并强制结束
powershell -Command “taskkill /F /PID (Get-WmiObject Win32_Service -Filter
"Name=’openclaw’").ProcessId”
然后重启
nssm start openclaw
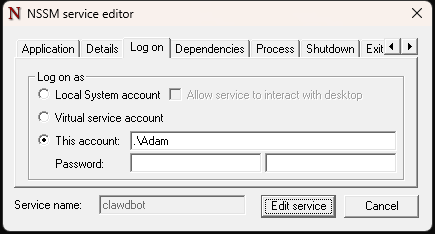
1 | # 打开 GUI 编辑界面 |
- 切换到 Log on (登录) 选项卡。
- 选择 This account (此账户)。
- 输入你的 Windows 用户名和密码。
- 点击 Edit service 保存。
最后重启服务:
1 | nssm restart openclaw |
现在,openclaw 就会作为 Windows 服务在后台静默运行了。
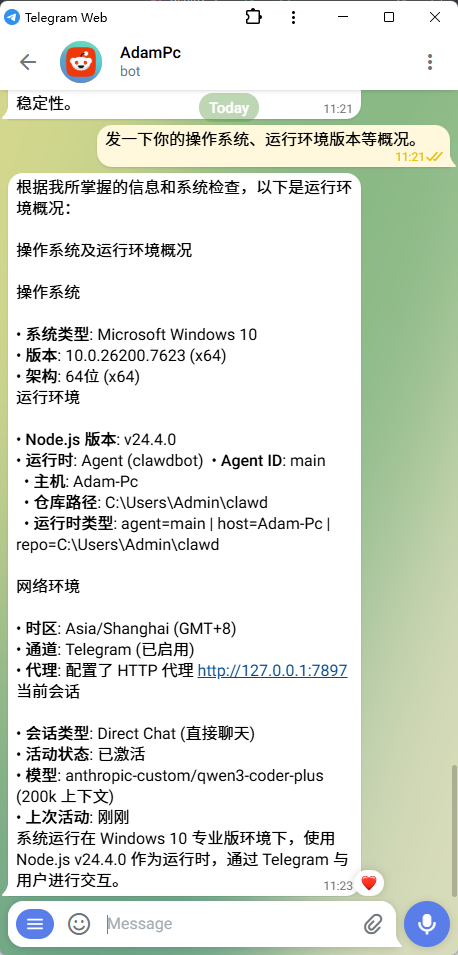
运行状态验证
部署完成后,你可以在 Telegram 中通过相关命令查看 Bot 的运行状态,确保其正确识别了 Windows 环境和模型:
常用管理命令
1 | # 停止服务 |